Your cart is currently empty!
What is needed to prepare wood for staining ?
Learn how to prepare wood for staining and discover Ready Seal Direct products for a flawless, durable finish. Perfect for DIY projects!
Keyword:- Prepare Wood for Staining
Staining wood is a fantastic way to enhance its natural beauty, add color, and protect it from wear and tear. However, the key to achieving a professional-looking finish lies in proper preparation. Without the right preparation, the stain may not adhere evenly, and the final result could look patchy or uneven. In this blog, we’ll walk you through the steps needed to prepare wood for staining and introduce you to Ready Seal Direct products, which can make the process easier and more efficient.
Why is Preparing Wood for Staining Important?
Before diving into the steps, it’s essential to understand why preparation matters. Wood is a porous material, and its surface can have imperfections, dirt, or old finishes that prevent stain from penetrating evenly. Proper preparation ensures:
- Even Stain Absorption: A smooth, clean surface allows the stain to absorb uniformly.
- Long-Lasting Results: Properly prepared wood ensures the stain adheres well, increasing its durability.
- Enhanced Appearance: Preparation removes blemishes, ensuring the final finish looks professional.
Steps to Prepare Wood for Staining
- Choose the Right Wood: Not all wood is created equal. Softwoods like pine and cedar absorb stain differently than hardwoods like oak or maple. Choose the type of wood that suits your project and understand how it will react to staining.
- Sand the Wood: Sanding is the most critical step in preparing wood for staining. It smooths the surface, removes imperfections, and opens up the wood pores for better stain absorption.
- Start with coarse-grit sandpaper (80-100 grit) to remove rough spots or old finishes.
- Gradually move to finer grits (150-220 grit) for a smooth finish.
- Always sand in the direction of the wood grain to avoid scratches.
- Clean the Surface: After sanding, the wood surface will have dust and debris. Use a tack cloth or a damp rag to wipe away all the dust. For stubborn residues, you can use a wood cleaner or mineral spirits.
- Fill Cracks and Holes (If Necessary): If your wood has cracks, holes, or knots, use a wood filler to patch them. Ensure the filler is stainable, as some fillers don’t absorb stain and can leave visible patches.
- Apply a Wood Conditioner (For Softwoods): Softwoods like pine tend to absorb stain unevenly, leading to blotchy results. Applying a wood conditioner before staining helps seal the pores and ensures an even finish.
- Test the Stain: Before applying the stain to the entire surface, test it on a small, inconspicuous area. This helps you see how the stain will look and whether you need to adjust the color or application method.
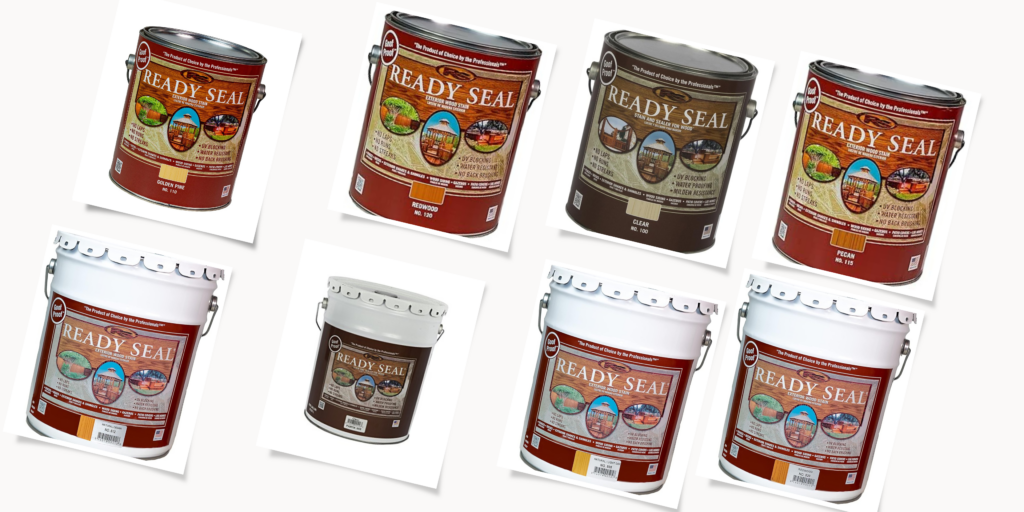
Ready Seal Direct Products for Wood Staining
When it comes to staining wood, Ready Seal Direct offers high-quality products that simplify the process and deliver exceptional results. Here are some of their top products:
- Ready Seal Wood Stain and Sealer: Ready Seal’s wood stain and sealer is a popular choice for both professionals and DIY enthusiasts. It combines stain and sealer in one product, saving time and effort. Key features include:
- No Primer Needed: It penetrates deep into the wood, eliminating the need for a separate primer.
- Easy Application: Can be applied with a brush, sprayer, or roller.
- Weather-Resistant: Provides excellent protection against UV rays, moisture, and mildew.
- Available in Multiple Colors: Choose from a variety of shades to match your project.
- Ready Seal Exterior Wood Stain: Specifically designed for outdoor projects, this product is perfect for decks, fences, and siding. It offers:
- Durability: Withstands harsh weather conditions.
- Low Maintenance: Requires no back-brushing or wiping off excess stain.
- Eco-Friendly: Low VOC formula makes it safe for the environment.
- Ready Seal Deck Stain: If you’re staining a deck, this product is a game-changer. It provides:
- Deep Penetration: Protects the wood from within.
- UV Protection: Prevents fading caused by sun exposure.
- Waterproofing: Keeps moisture out, preventing rot and warping.
- Ready Seal Cedar Tone Stain: For those who love the natural look of cedar, this stain enhances the wood’s beauty while providing protection. It’s ideal for:
- Cedar Siding: Brings out the rich tones of cedar.
- Fences and Decks: Adds a warm, natural finish.
Tips for Applying Ready Seal Products
- Stir Thoroughly: Always stir the stain before application to ensure an even color.
- Apply in Moderate Temperatures: Avoid staining in extreme heat or cold for the best results.
- Use the Right Tools: A brush, roller, or sprayer can be used depending on the project.
- Allow Proper Drying Time: Follow the manufacturer’s instructions for drying time between coats.
Conclusion
Preparing wood for staining is a crucial step that shouldn’t be overlooked. By sanding, cleaning, and conditioning the wood, you ensure a smooth, even finish that enhances the wood’s natural beauty. Ready Seal Direct products make the staining process easier and more efficient, offering durable, weather-resistant finishes for both indoor and outdoor projects. Whether you’re staining a deck, fence, or furniture, Ready Seal has the perfect product to meet your needs.
By following these steps and using high-quality products like those from Ready Seal Direct, you can achieve professional-looking results that will last for years to come. Happy staining!
Leave a Reply